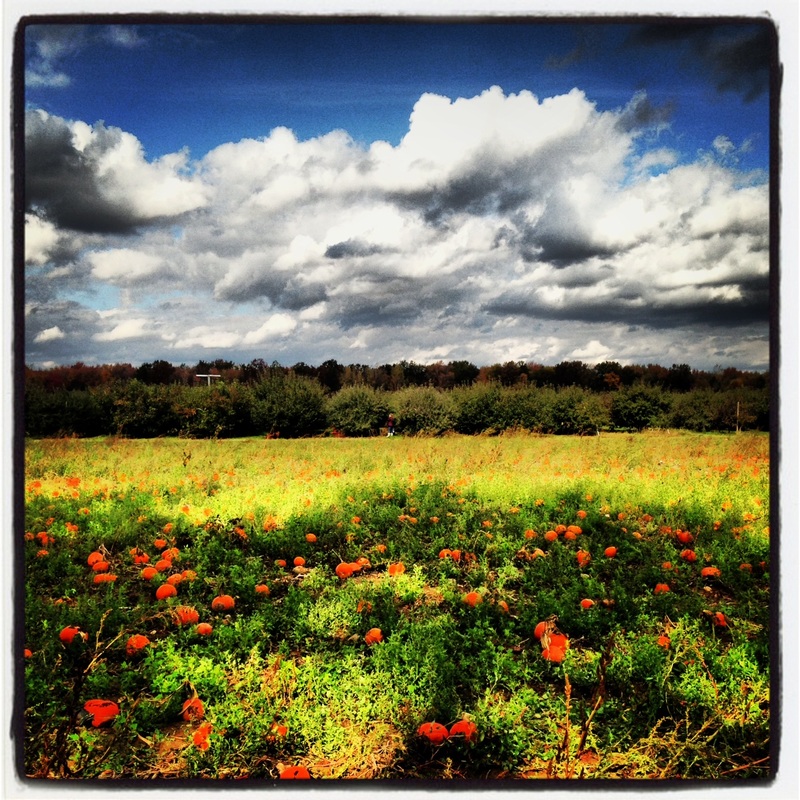
Went to the pumpkin patch this weekend.
 There was on old woman of skin and bones- oooooh, ooooooh, oooooh, ooh.
She lived down by the old graveyard- oooooh, ooooooh, oooooh, ooh. One day she thought she'd take a walk- oooooh, ooooooh, oooooh, ooh. She walked down by the old graveyard- oooooh, ooooooh, oooooh, ooh. She saw some bones a'laying around- oooooh, ooooooh, oooooh, ooh. She went to the closet to get a broom oooooh, ooooooh, oooooh, ooh. She opened the door and... BOO! 
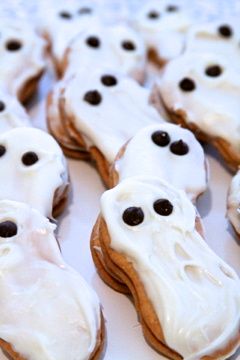 Create a spooky batch of cookies- it takes about three seconds and requires no baking. Awesome for Halloween parties or to snack on while watching scary movies.
Ingredients: 1 Box of Nutter Butter Cookies 8 ounces White Chocolate Chips Miniature Chocolate Chips <or> any candy that is tiny and round Melt the white chocolate in the stove or microwave- whichever method you use, stir constantly to avoid scalding the chocolate. Dip the cookies into the melted chocolate or spread using a knife. Press two chocolate chips into the chocolate- these are the eyes. Done! 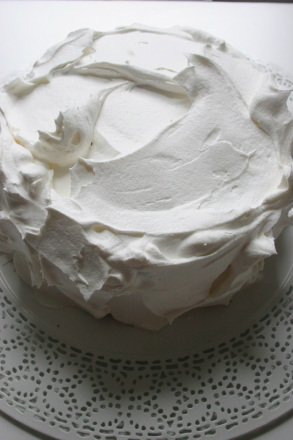 This is an involved dessert, but it just may be the showstopper at the 4th of July picnic this year. This cake is deceiving. Simple as can be from the outside, a one-two punch of patriotic pride on the inside. 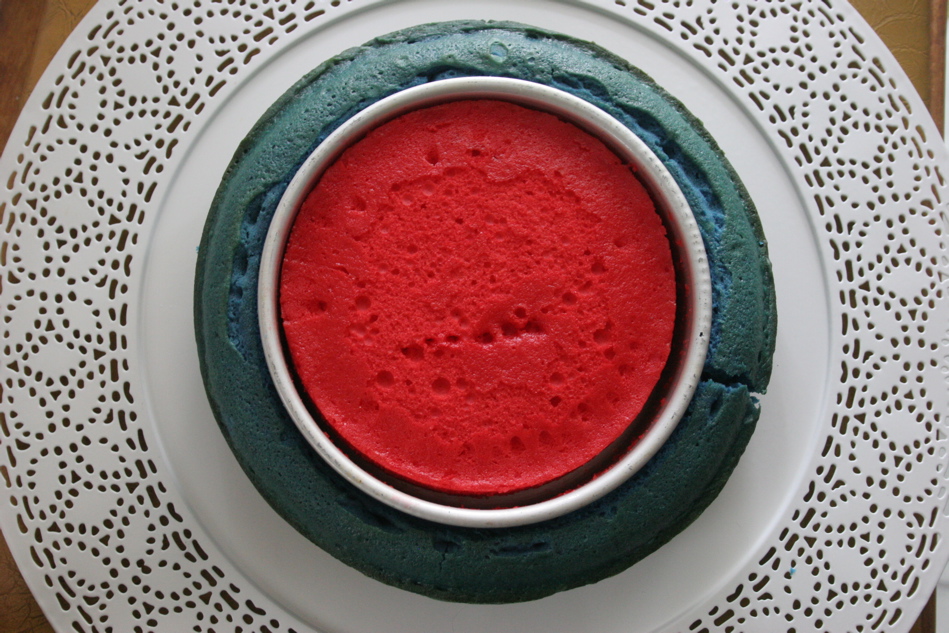 Again, it's a pain to make, but definitely worth it. As you're toiling away, cursing the logistics of this dessert, keep in mind that a 17 year old made the original flag cake using a concept her father came up with.Let's jump into it! Ingredients: 2 Boxes of White Cake Mix Red + Blue Food Coloring 2 Round 8" Inch Cake Pans Frosting, lots of it: Cool Whip | Pre-made | Homemade [whatever you're into] Sparklers [optional] 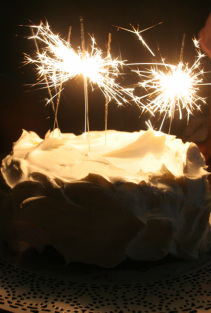 Make one batch of batter. Follow instructions on box to prepare it. Dye it red, and divide it equally into the two 8" pans. Bake it according to instructions.. Make another batch of batter using the other box of cake mix. Divide and conquer by dyeing one bowl blue, leaving the second bowl white. Now bake one white and one blue cake in the 8" pans. Checklist:[what you should now have] Two 8" RED Cakes One 8" BLUE Cake One 8" WHITE Cake Slice the two red cakes in half to make 4 red layers total. Cut a 4" circle out of ONE of the layers. Discard the remaining pieces as well as the 3rd 8" RED layer. Yes- get rid of it, let someone eat it. RED tally: One 4" layer, Two 8" layers Now onto the white: Slice the white layer in half. Cut a 4" circle out of ONE of the WHITE layers. WHITE tally: One 4" layer, One 8" layer Let's take on the blue cake: DO NOT slice in half. Instead, cut a 4" circular hole into the absolute center of the Blue layer. Remove the hole- toss it. BLUE tally: One 8" layer, with a 4" circle in the center of it. Assembly: Start with an 8" RED layer on the bottom, frost it. Now add an 8" WHITE layer. Frost. Another 8" RED layer. Frost. Now add the BLUE with the hole- support with cardboard or cutting board so it doesn't implode during transport. Now drop the 4" WHITE circle into the center of the BLUE layer- there should be a hole that was cut out of it. Frost. Stack the 4" RED layer into the hole, directly on top of the white layer. Frost. 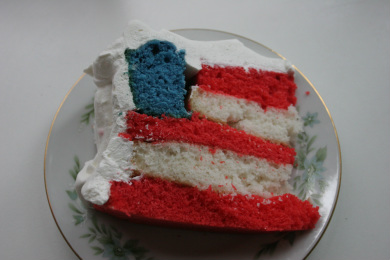 Now bask in the glory that is... The Flag Cake!
A Final Note> Sometimes this cake was disastrous ie: tossing the entire thing & starting again + a humid day can wreak havoc on the presentation... And as I am looking to minimize the vast amount of waste that occurs when making this cake, please note the photo of the cake in the pan is an experiment and not listed in these instructions. 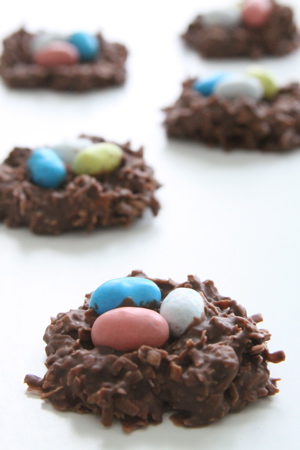 Springtime is here and what better way to celebrate than to create chocolate bird nests- using extra chocolate bunnies that are probably hopping around the house. Children can help with this entire project; it's simple and hard to mess up. 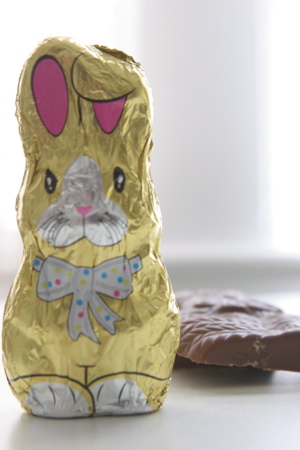 Tear the foil wrapping off of the chocolate bunnies and break them apart into pieces. Melt the chocolate, stirring frequently to avoid scalded chocolate. [chocolate chips may be substituted for Easter chocolate] 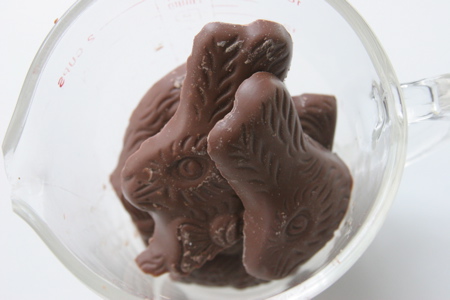 Throw some coconut into the melted chocolate concoction- add more if needed. Just estimate the measurements- you should be should be able to spoon a large dollop of the chocolate and shredded coconut mixture onto a cookie sheet. Place some eggs [whatever candy at home that resembles an egg- jellybeans, malted eggs, etc] in the center of each nest. Place in refrigerator until set.
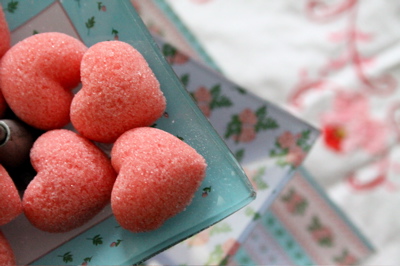 Cupid arrived with his bow + arrow, stinging everyone with his love potion. Celebrate this lovey-dovey day with a tea party with your sweetie-pies. Get as involved or simple as you want, kids will be happy either way! Start with a kid-friendly tea, like a caffeine free fruit sampler, then everyone can choose their favorite flavor. Bring some water to a rolling boil & transfer to the teapot. Add some goodies like finger sandwiches shaped with a heart cookie cutter to create a cool design in the bread. Serve teatime classics like English cucumber sandwiches with sliced tomatoes, or egg salad for a mid-day luncheon, or sweets like cupcakes or cookies for an afternoon tea.  Include special touches for a memorable time. Heart-shaped sugar cubes, tinted to match your true love's heart, are easy to make. Kids have fun putting the cube into their tea and watching it change colors in the cup. 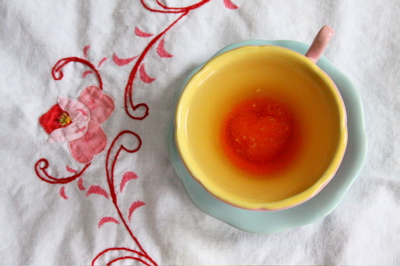 Blow up balloons and scatter them around. Grab some markers and decorate them with designs or draw faces on them. Later, they are great for some safe indoor play. Find some stashed-away linens and throw them on the table for a decorative touch. Turn on favorite music to set the mood. Wear a vintage stole, fancy hats, a crown, or dress up in jewelry and dresses to create everlasting memories. To Make Sugar Cubes:
-Sugar -Water -Food Coloring -A Candy Mold Place sugar in small bowl, add water a few drops at a time, stirring with each addition. Then add some food coloring and mix until the desired shade is achieved. Use too much liquid, the sugar will disintegrate, use too little & sugar will not form into the mold properly. The sugar should be slightly damp, definitely not wet. Basically- use your best judgment, Then pack some sugar into the molds & leave until dry, about an hour. Pop out the shaped sugar cubes & enjoy during the tea party! 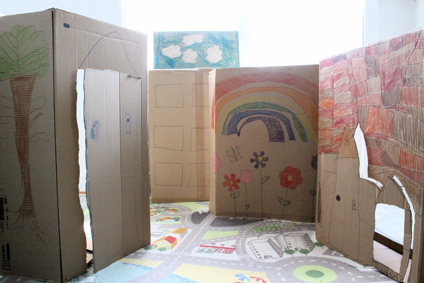 Who's gonna run this town tonight, your kid, of course! Have a ton of boxes sitting around, remnants from the holiday season? Put them to good use and create a "Cardboard Box Town." This project is especially welcome in the midst of winter- when the weather is frosty and the kids are inside more often. This activity comes in handy for snow days and rainy days in the spring and allows them to use their imaginations and put their artistic skills to use. Ingredients: Large Cardboard Boxes Crayons or Markers Grab empty boxes. Place markers, crayons, and whatever else you can think of- and have the kids get to work designing their own town. Hours of fun, first drawing and coloring, and then playing!
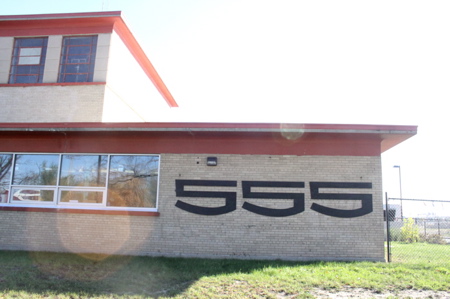 555 Gallery hosts an art club for children on the second Saturday of the month. This is an opportunity to introduce your children to the arts or to give your creative superstar an outlet in which to produce their own work in a professional studio environment. The best part- the art space is housed in a former police precinct, and still has the cells in tact- what child wouldn't think that was badass?
The events vary in theme and are best suited for ages 7-14. The activities are fun- drawing cartoons, creating dioramas- not to mention making new friends and working alongside professional artists- pretty cool. There is an instructor present that will guide the class; the gallery sometimes welcomes guest artists to teach students. Classes are held from 11 a.m. until 1 p.m. and a reservation is recommended, as class sizes are limited. To RSVP, or for additional information about Saturday Art Club, contact Liz Sutton at Liz2555arts.org or 888.495.ARTS Please note: There is a nominal fee to attend.  An awesome exhibition, Lego Architecture: Towering Ambition, is currently on display at The Henry Ford Museum. It features scaled-down lego versions created by Lego pro Adam Reed Tucker. Among the thirteen structures you will find the Empire State Building, Falling Water, Chicago Spire, Jin Mao Tower, and the St. Louis Arch + Ford Field which Tucker created during the opening days of the exhibition. 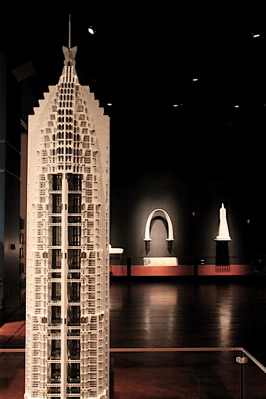 Tucker recreates renown architectural masterpieces. Its focus is heavy on the skyscrapers, [hence the "towering" title] but there are some "modest" reproductions included as well. And if you thought these structures to be amazing in real life- you have to check out the miniature versions- totally stellar! By using the unconventional construction materials we view as "toys-" we are able to view these buildings in a different way. 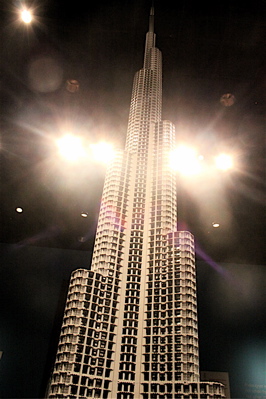 Special Lego Events offered at the Henry Ford Museum
LEGO® Create Create a building from one of the four categories- residential, commercial, institutional and industrial- and then place the LEGO® models on a large-scale city map. Daily through February 24, 9:30am–5pm LEGO® train Don’t miss our LEGO® train created by Michigan LEGO® User Group. Daily between November 20, 2012, and January 6, 2013, 9:30am–5pm Duplo® & Soft LEGO® Play Area 1- to 5-year–olds. Daily through February 24, 9:30am–5pm Free Learn-to-Build Saturdays! Learn to create a specially designed miniature of the museum’s Clocktower. Recommended for ages 10 and up with adult chaperone. Every weekend, December 1–30, 10am–4pm Brick Challenge with Nick Brickly A double-dare-style LEGO® challenge. Every Saturday, January 5–26, shows at 11:30am and 2pm Build Demonstrations Watch members of the Michigan LEGO® Users Group, an organization of adult fans of LEGO®, build a model of Detroit’s Renaissance Center. January 5, 12, 19 & 26, 3pm-5pm Adam Reed Tucker Returns! Last time to see and meet architecture artist Adam Reed Tucker. February 23–24 All event info retrieved from The Henry Ford Museum website. |
Monkey Tales™Monkey Tales™ is an evolving collection of things to make, places to go + more. All images and content ©Monkeys & Mayhem. Please Note: None of these activities, field trips or events are sponsored. This is just stuff we do + places we go irl.
Archives
March 2019
Categories
All
Read "The Story of Buntings" to discover what buntings are and what they mean to our family!
|
 RSS Feed